How To Create Heightmaps for Unreal Engine using Blender and Gimp
Hey everyone! I recently made a pack of 50 Free .PNG Heightmaps for Unreal Engine and have a Tutorial for you here as well!
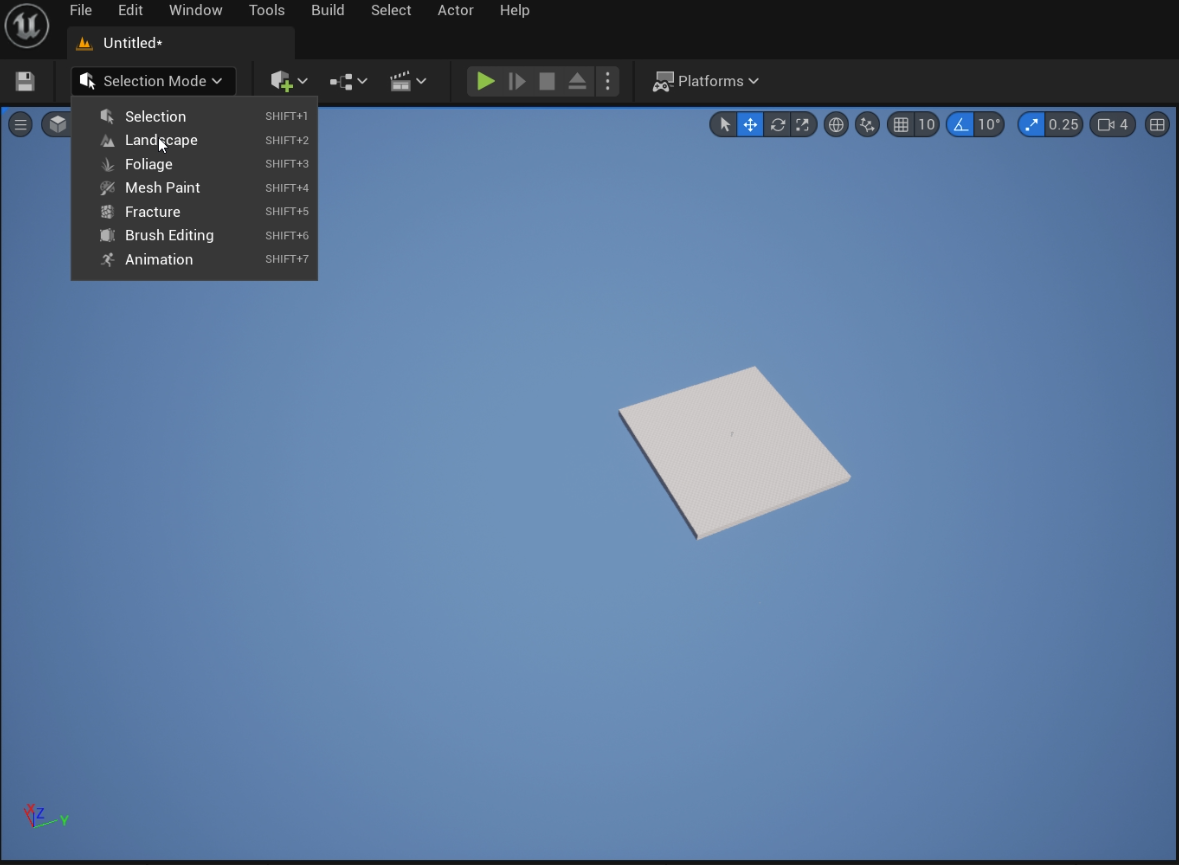
By the end of the tutorial, you'll be able to create Landscapes like this for Unreal Engine.
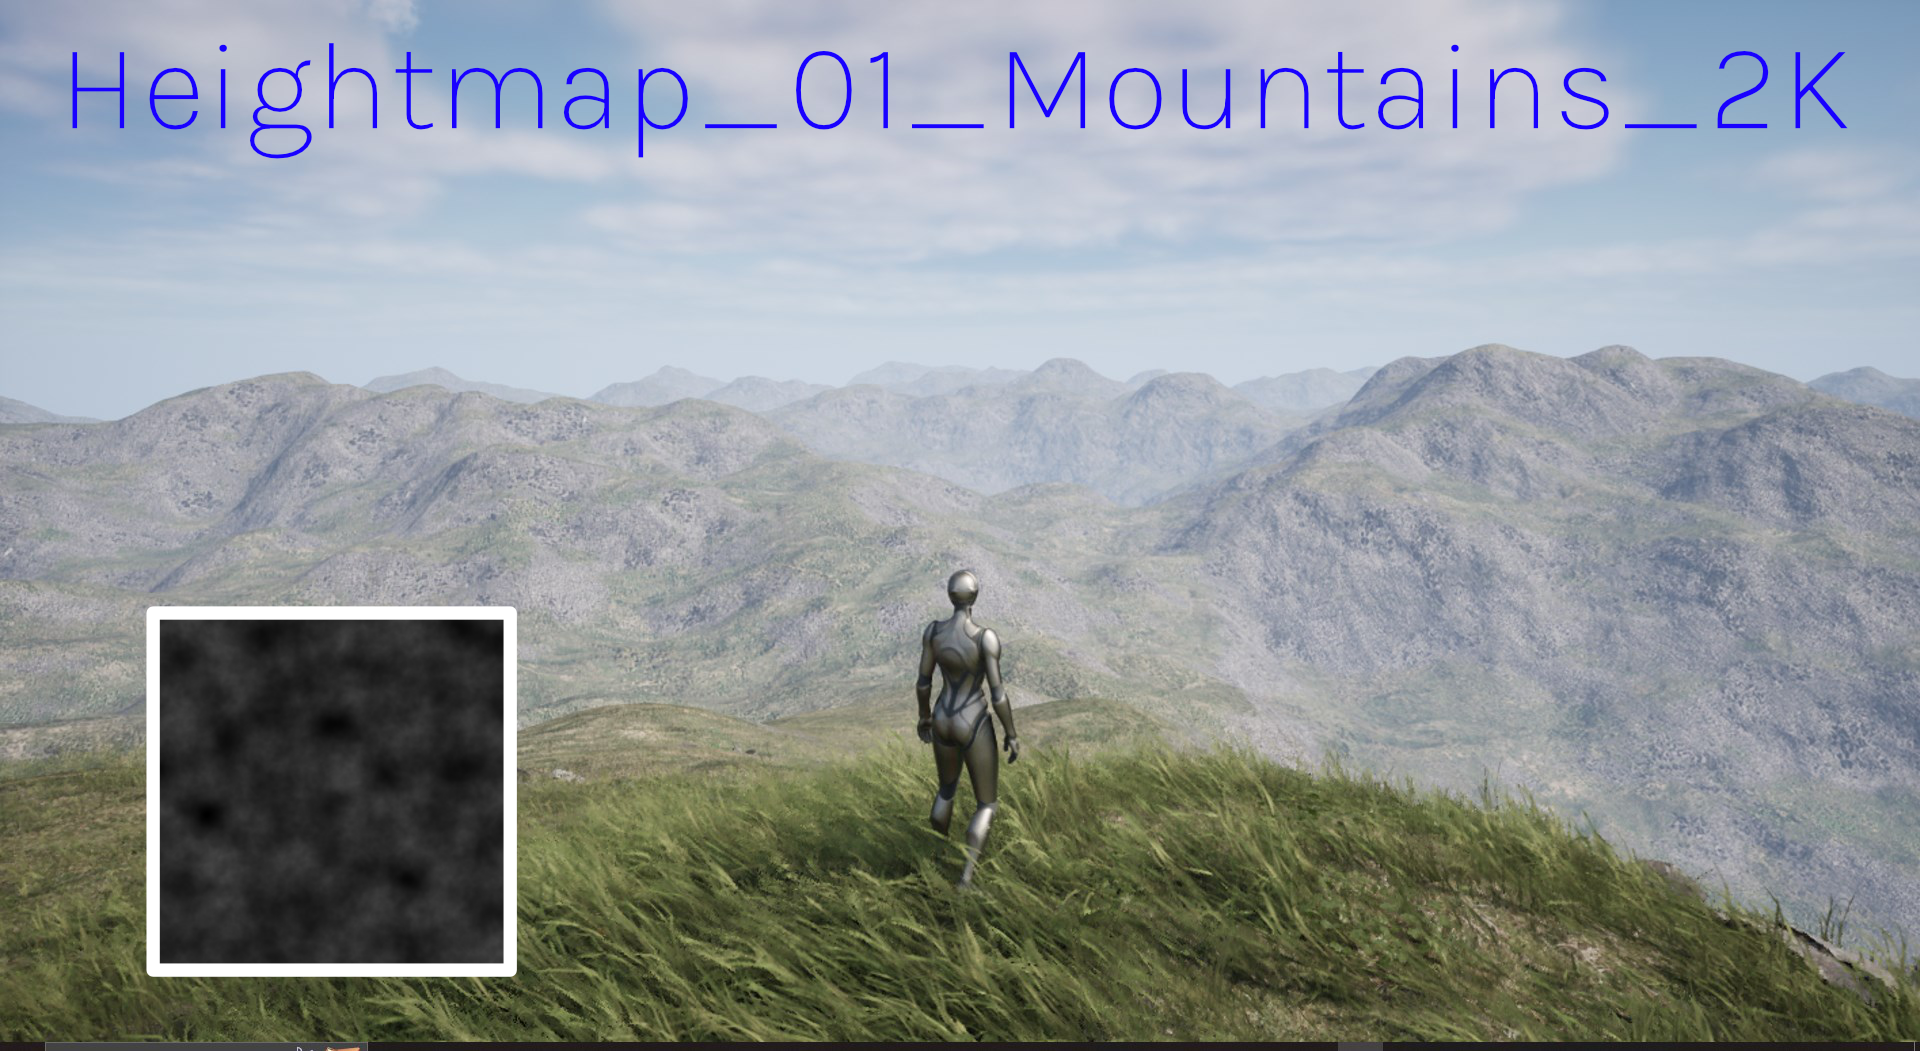
Disclaimer: Materials Not Included (Get them here: Landscape Material used: https://www.unrealengine.com/marketplace/en-US/product/brushify-shaders-pack)
How To Make and Use Heightmaps using Blender, GIMP and Unreal Engine by GameDevGary
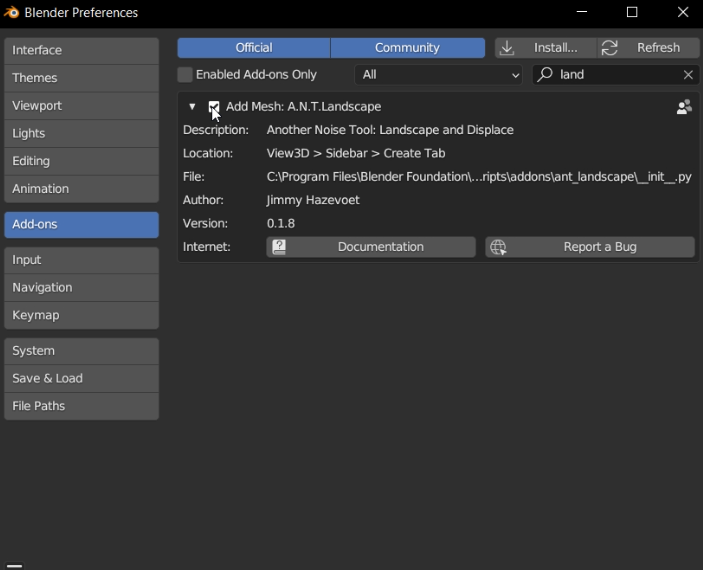
To Start, create a clean Project in Blender, then go to Edit>User Preferences.

Then, in the Addons Tab, search for "land" and enable A.N.T. Landscape Addon. (A.N.T. Landscape Manual: https://docs.blender.org/manual/en/latest/addons/add_mesh/ant_landscape.html)
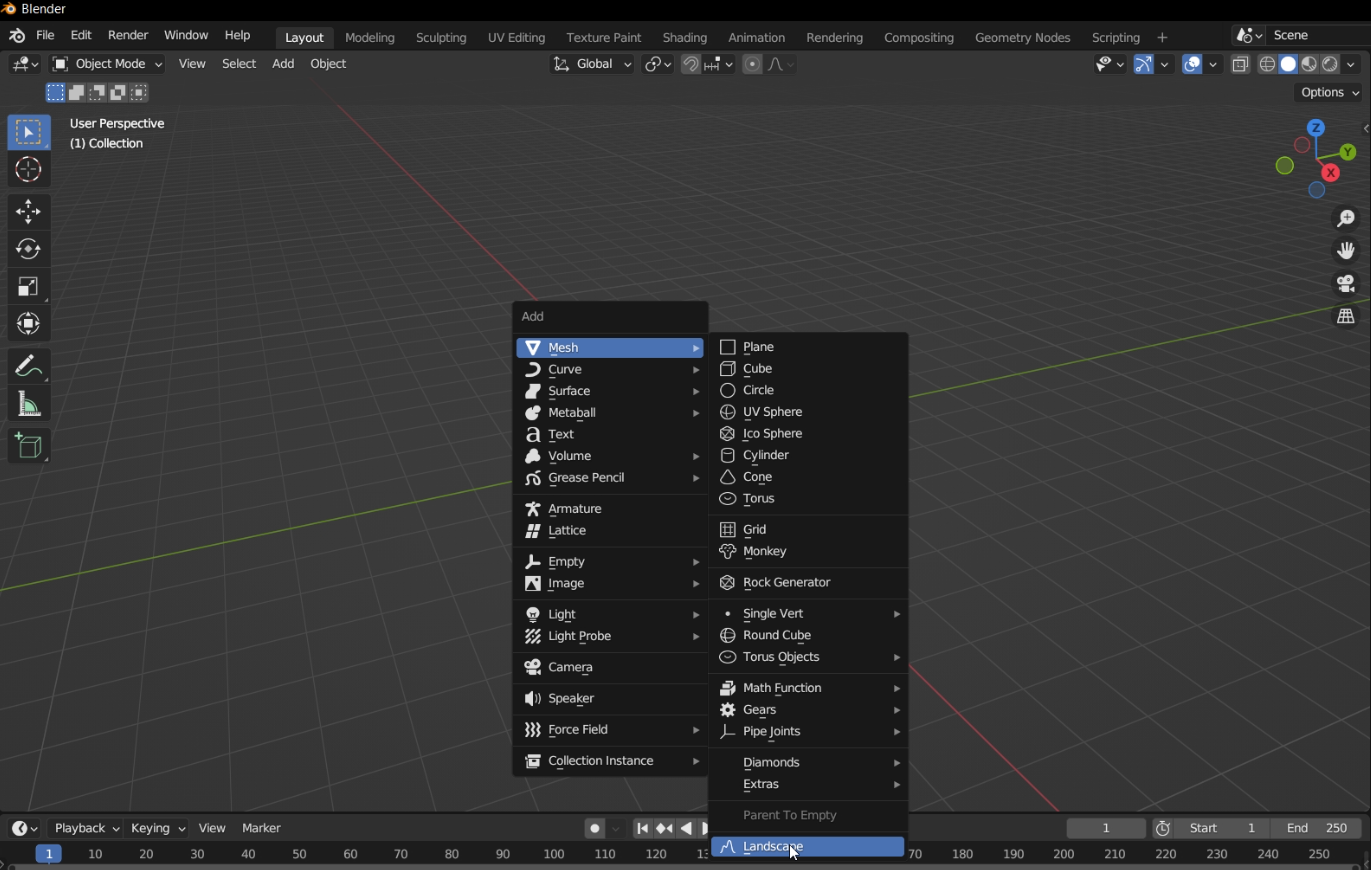
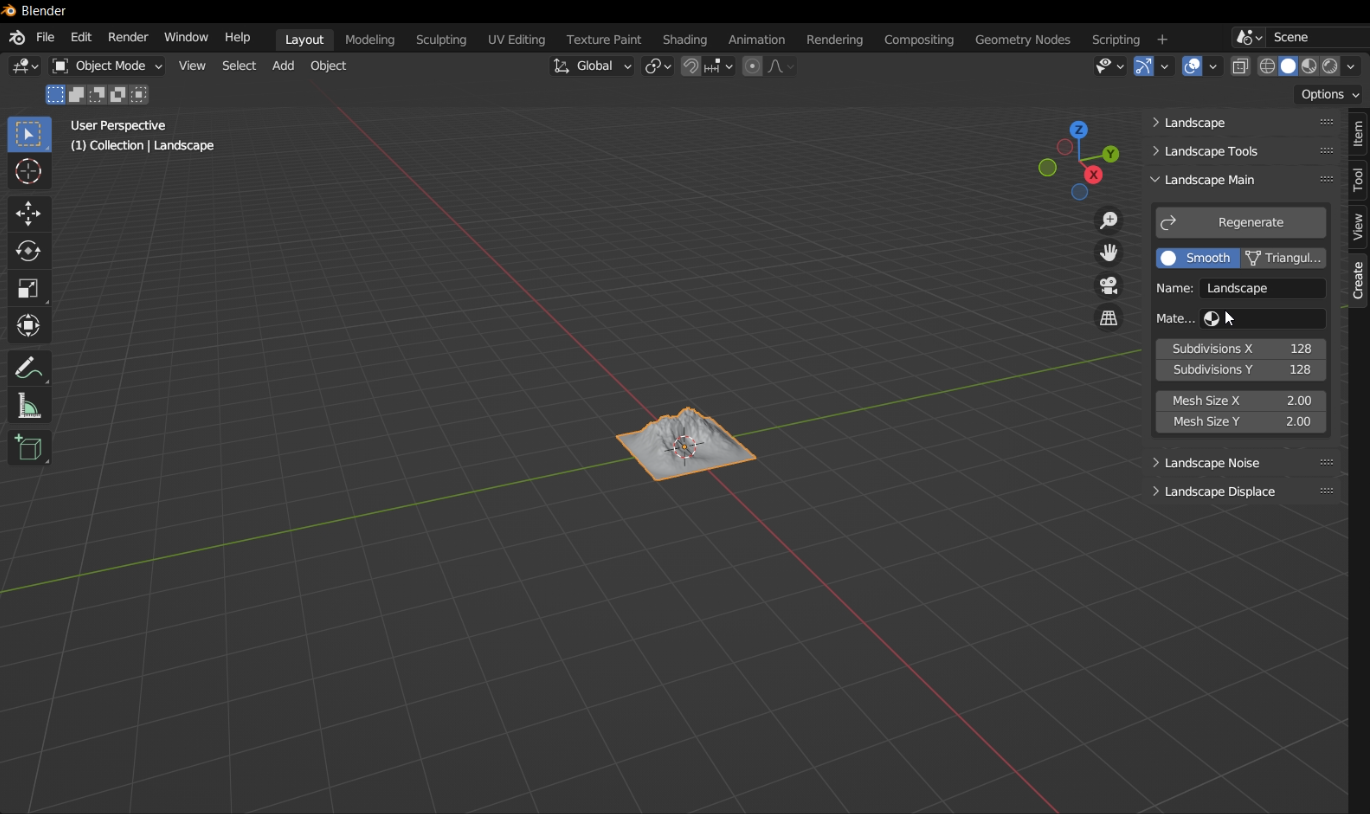
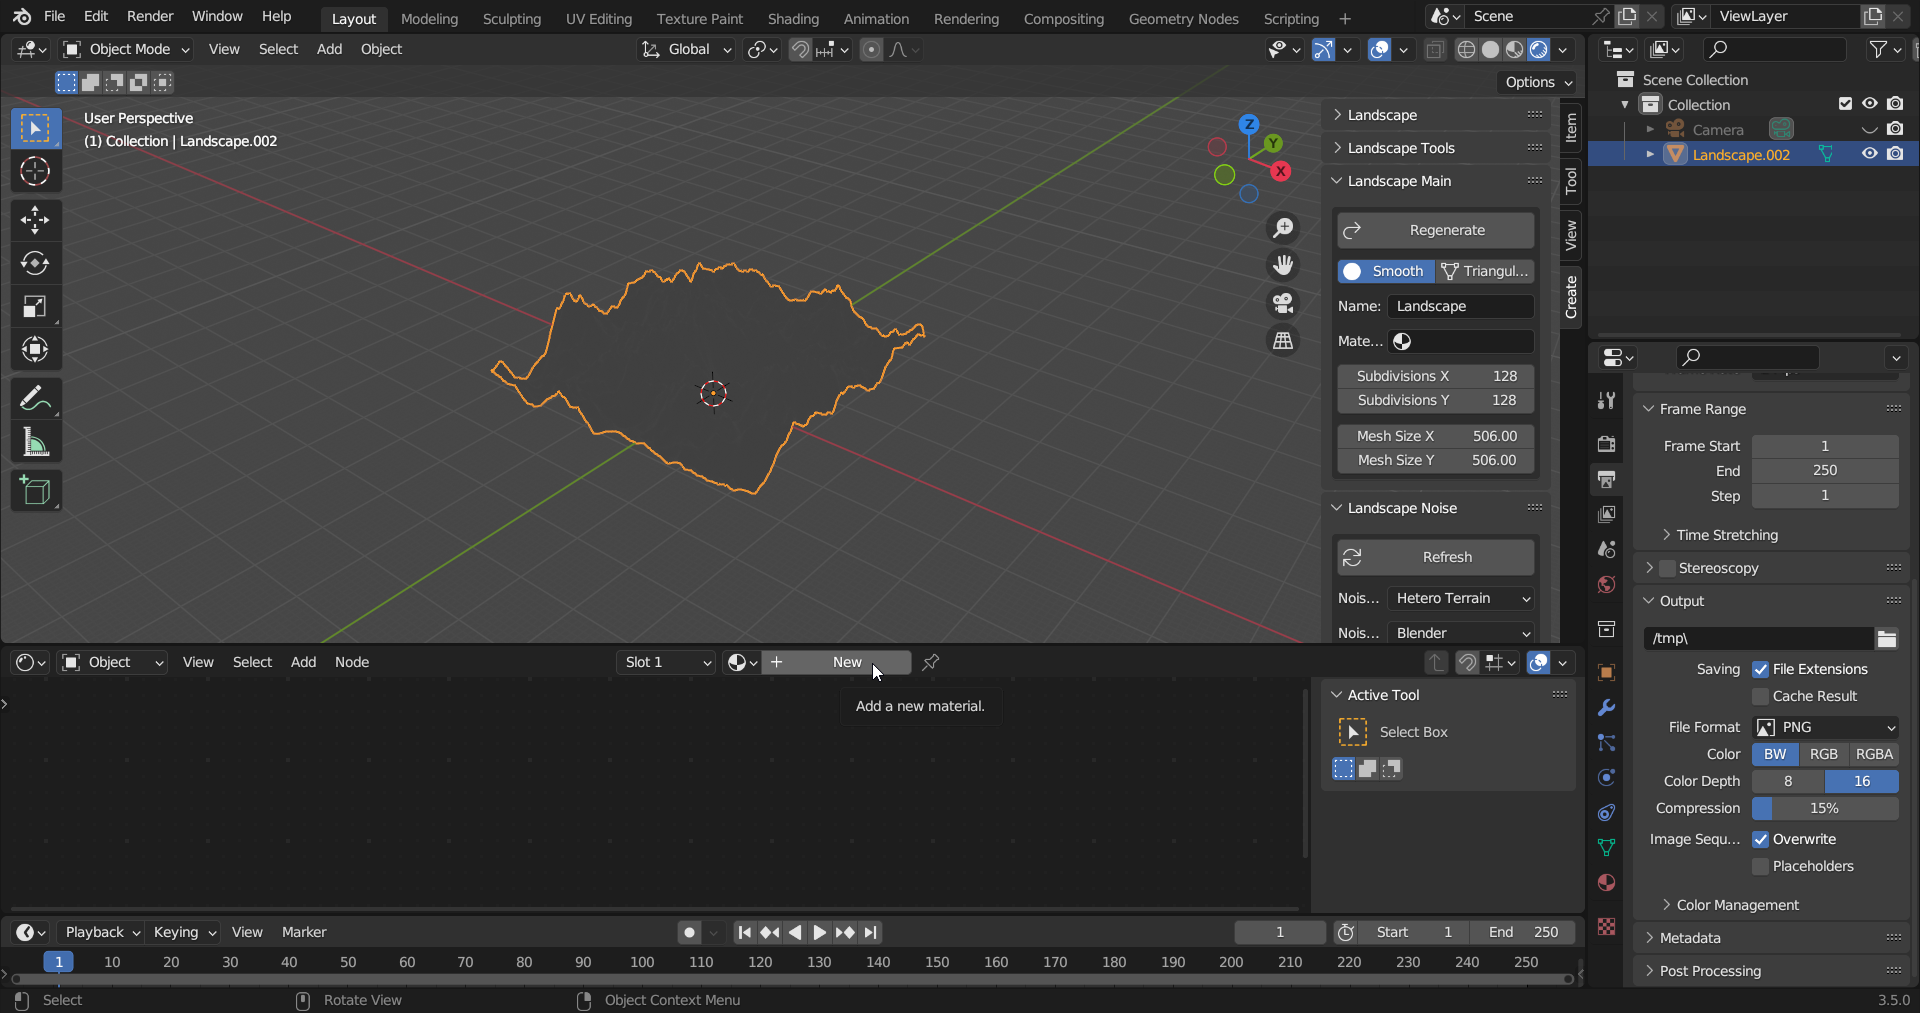
Now in the scene view we can press Shift+A and add a Landscape.
Once you add the Landscape, there's an operator box that appears for it. The first instinct most people have is to begin editing landscape using it, this is how I did it for a long time. The problem is that, as soon as you deselect the landscape, the panel is gone forever. This is not the way.
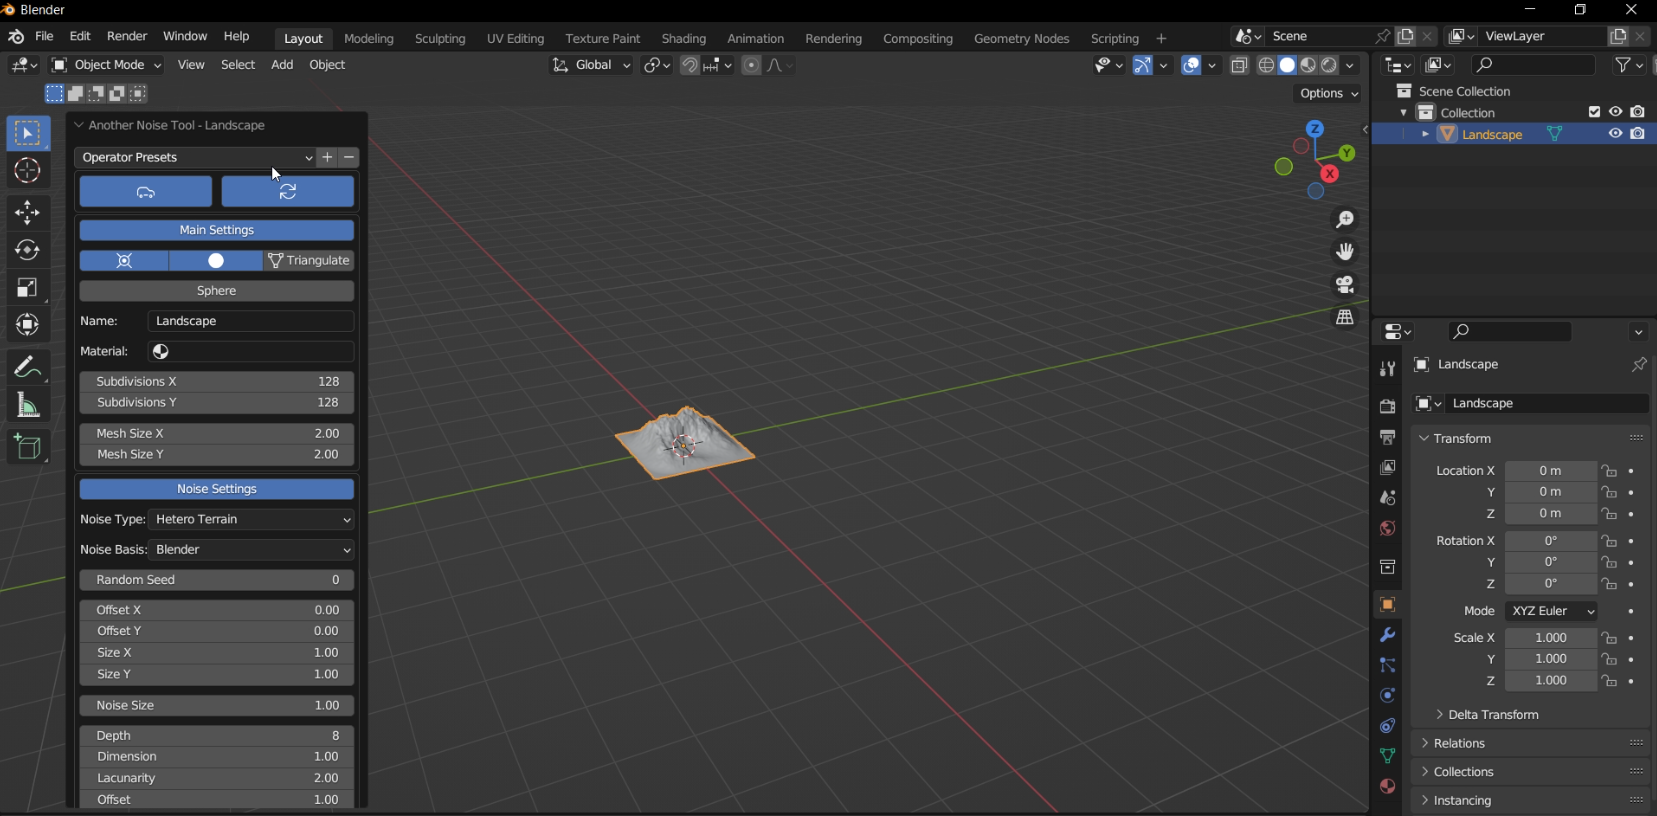
The solution is to select the Landscape, press the N key, and select the Create Tab. This gives us access to tools that won't disappear! This is the way.
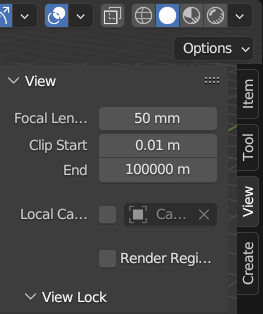
While we're here, also select the View Tab and increase the View End clip value by a couple decimal places! This is so we can see any very large landscapes.
Now we can get to creating the Landscape, the first thing we need to do is properly set the scale! Since we're making the Landscape for Unreal Engine, refer to the chart below and Set Mesh Size X and Y to match your desired size. 1px=1meter

Chart Source @ Landscape Technical Guide: https://docs.unrealengine.com/4.27/en-US/BuildingWorlds/Landscape/TechnicalGuide...

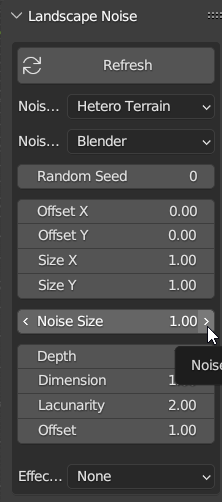
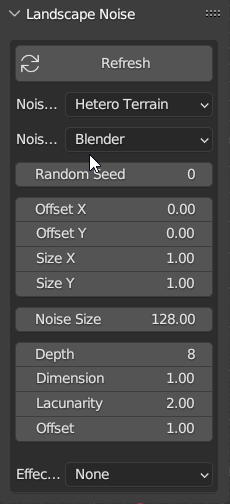
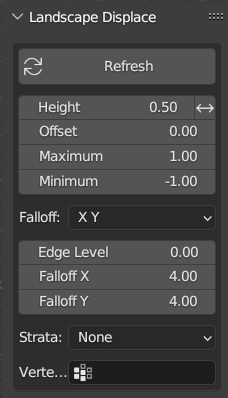
Once you've chosen and set a Landscape size, press Regenerate. Now we need to adjust some other settings to match our new scale. In the Landscape Noise Panel (below Landscape Main), we need to increase Noise Scale, 128 is a good value to start with.
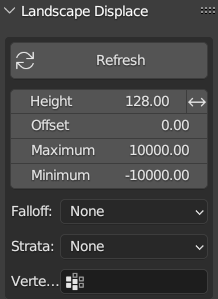
Next, in Landscape Displace, we need to Disable Falloff, Increase Height to 128 as well, and increase the Min-Max ranges for Height to -10000 and 10000.
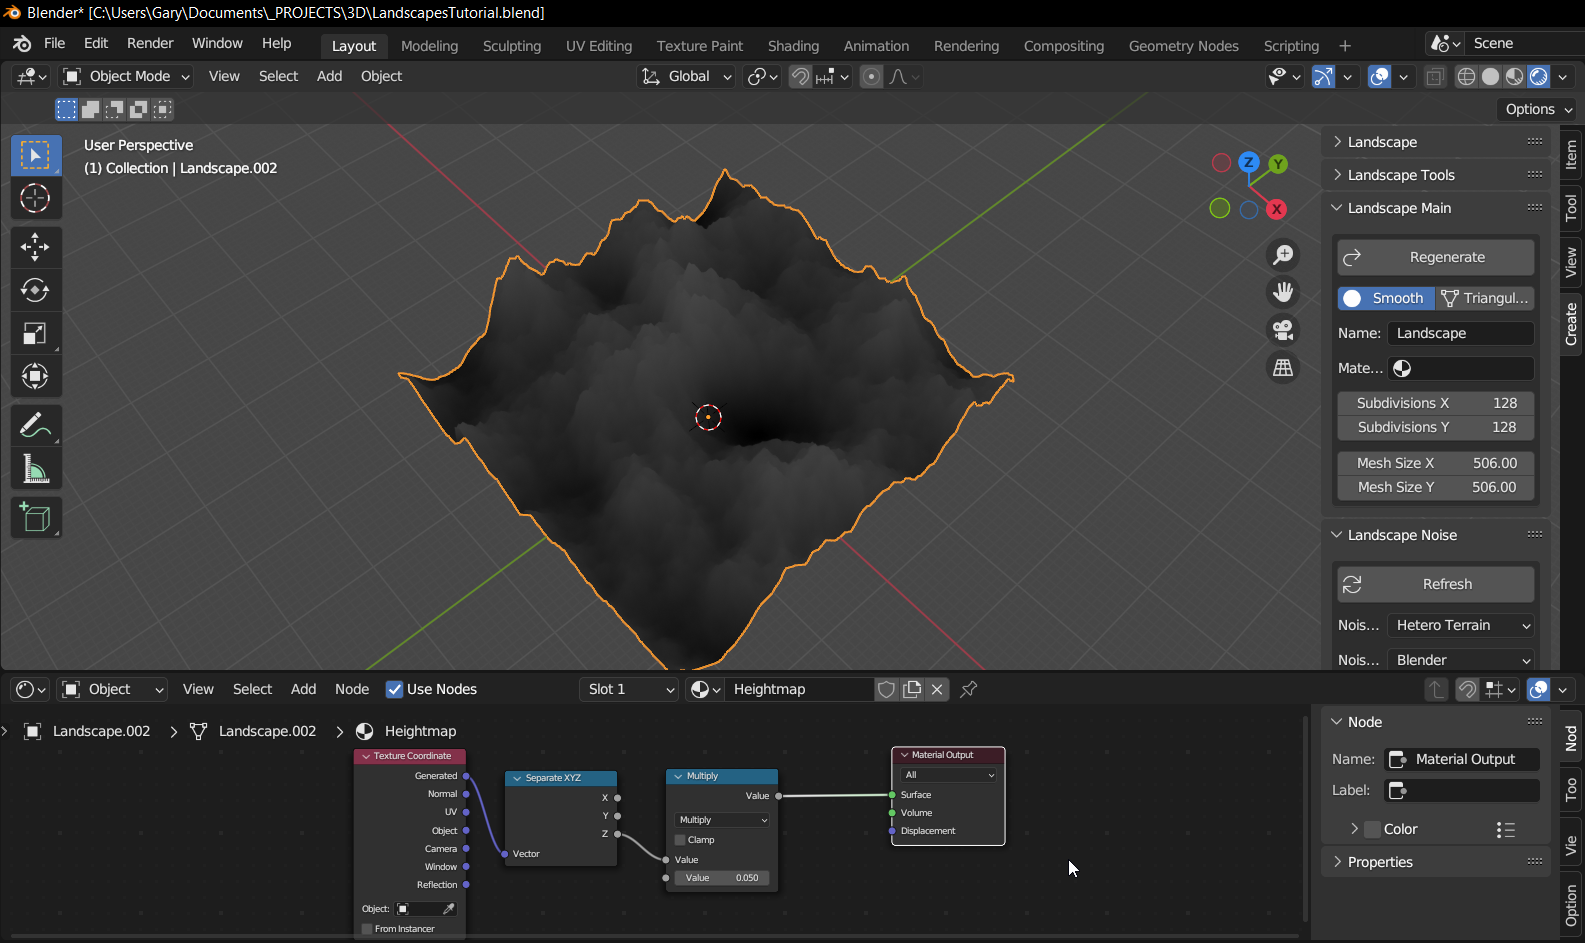
Now your landscape should look similar to what's above. Now we'll create the Heightmap Material! To start, create a new window by clicking and dragging from the bottom left corner of the viewport window.
Then, change the window mode to Shader Editor.

Now your view should look like this, we can now create a new Material and call it Heightmap.
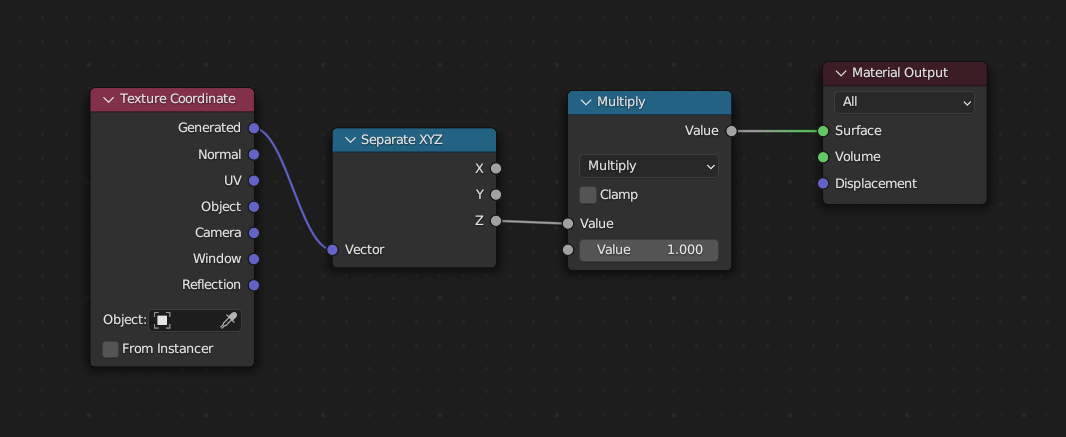
This is the Heightmap Material, it's pretty straightforward. The nodes are Texture Coordinate > Separate XYZ (Vector) Z > Math (Multiply) > Material Output.
Derived from comments under this video on how to bake Displacement Maps by Default Cube:
To preview the Material, you can switch to Rendered mode by pressing Z and selecting Rendered.
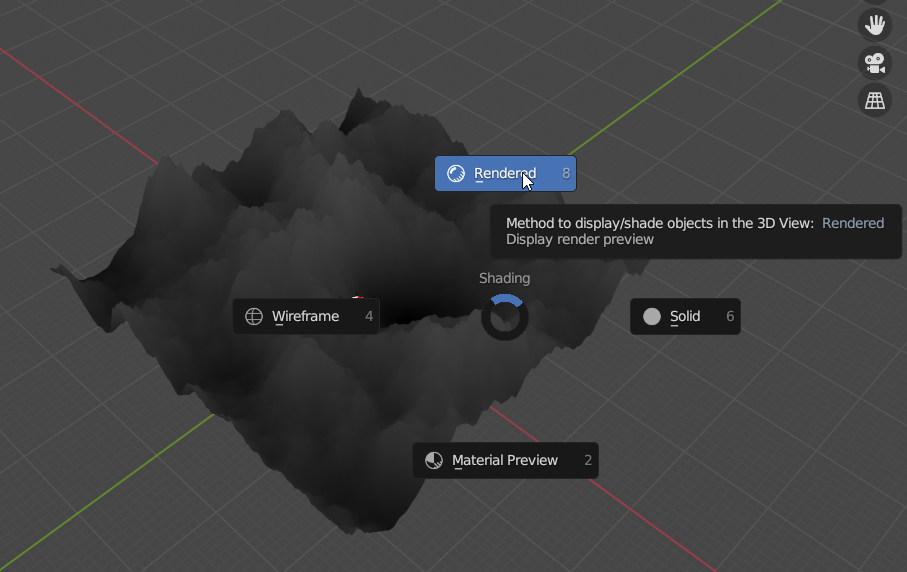
Now you should have this!
I recommend multiplying the Heightmap Z output by a low value like 0.05 and working up from there because the actual height of the landscape in Unreal Engine will be determined by the brightness and darkness range of the Heightmap image, not by the height of the landscape in blender.
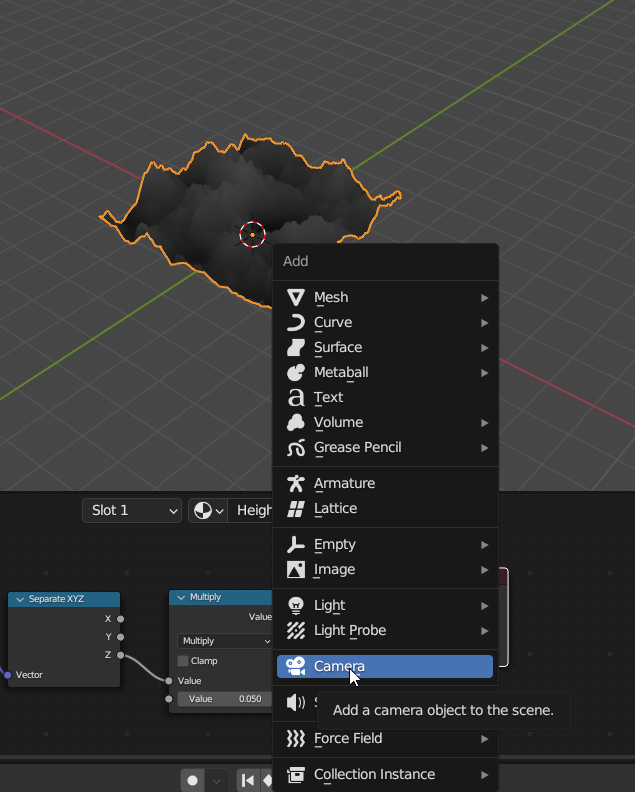
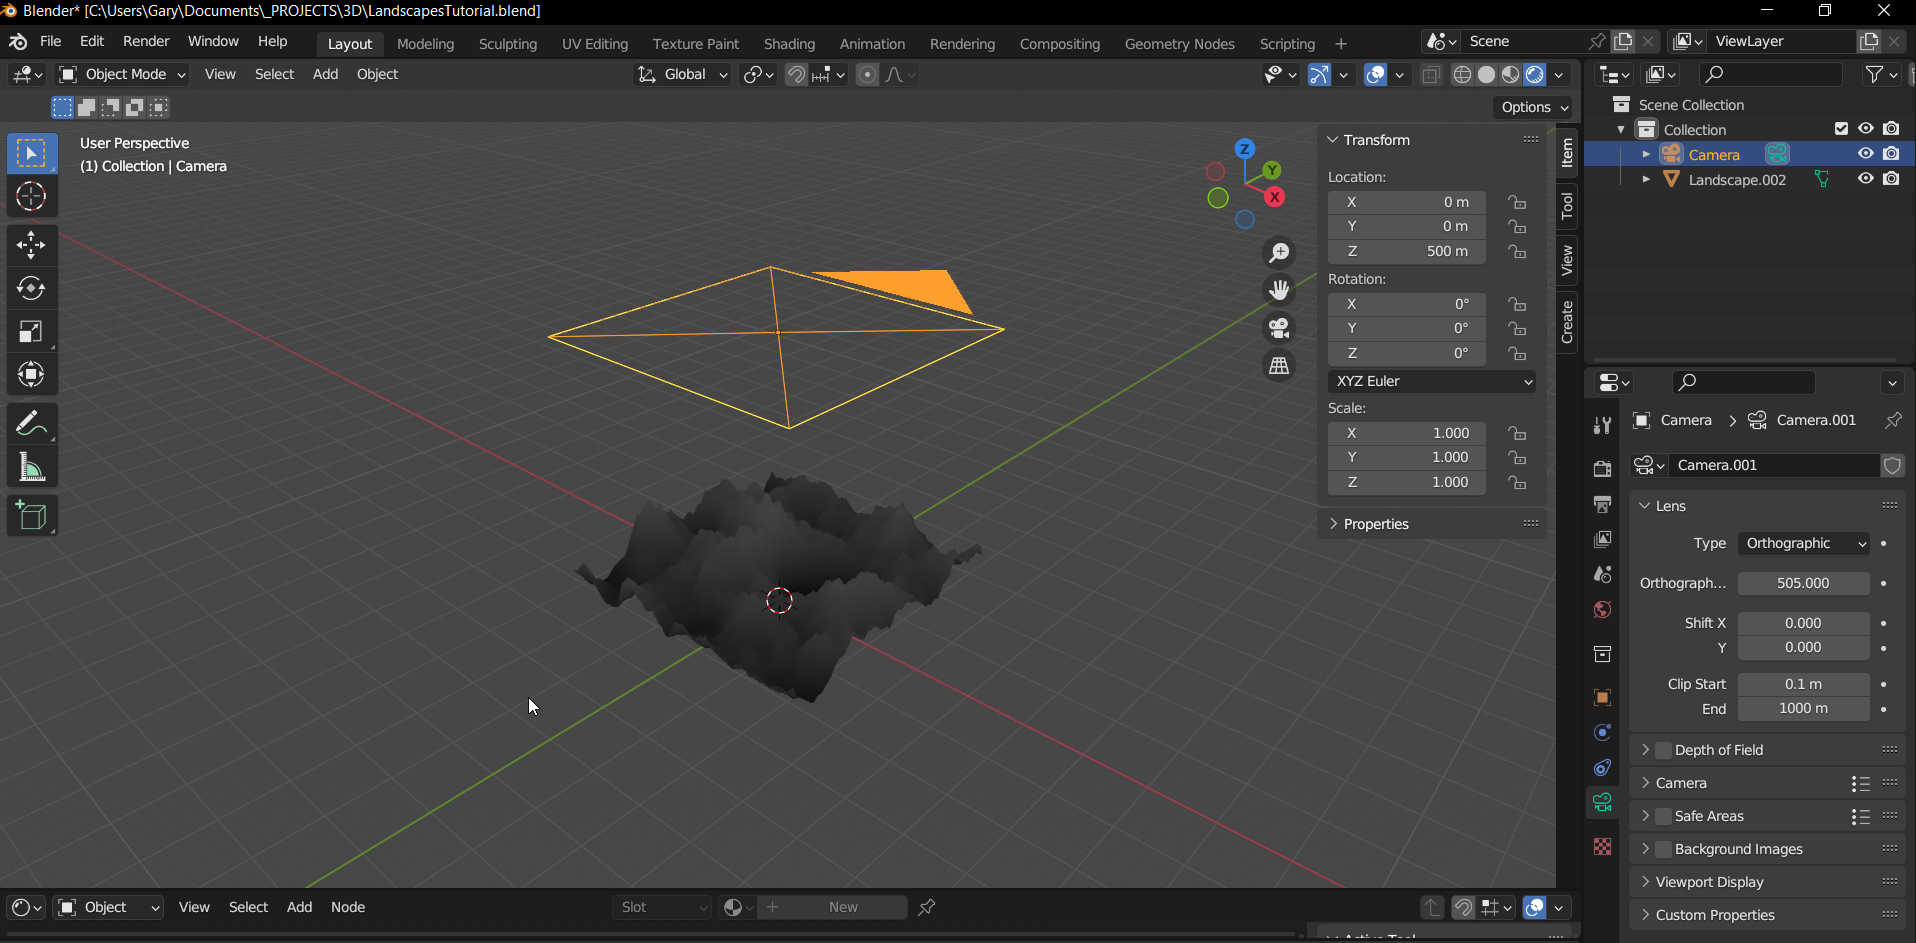
The only thing left to create is the camera! Good job so far!
Shift+A > Camera
Select the camera, zero out rotation, position, then raise it up by some distance, 500m used here. Then under the Camera Tab, set the Camera Type to Orthographic, then the Orthographic Size to the the size of the landscape, 505 in this case.
Now, in the Output Properties Tab, we need to set the Resolution X and Y to the size of the Landscape, and under Output, we need to set Color to BW and Color Depth to 16.
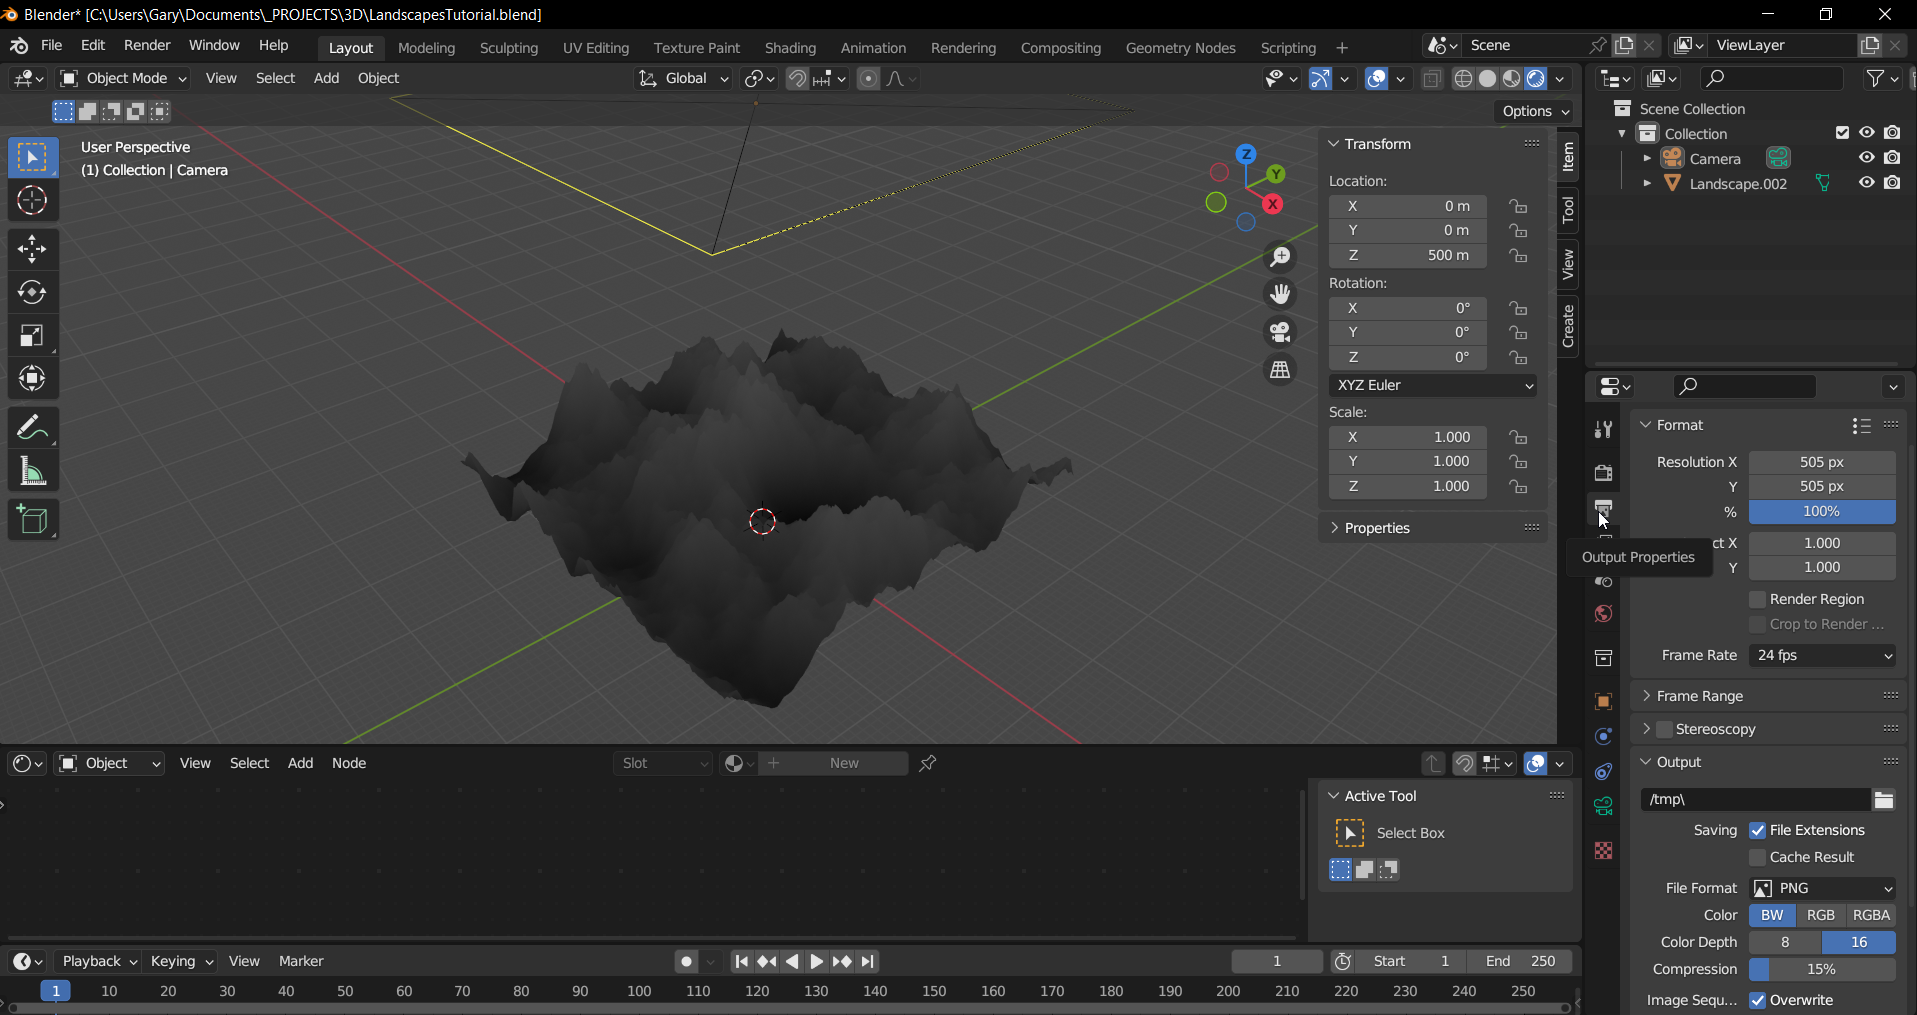
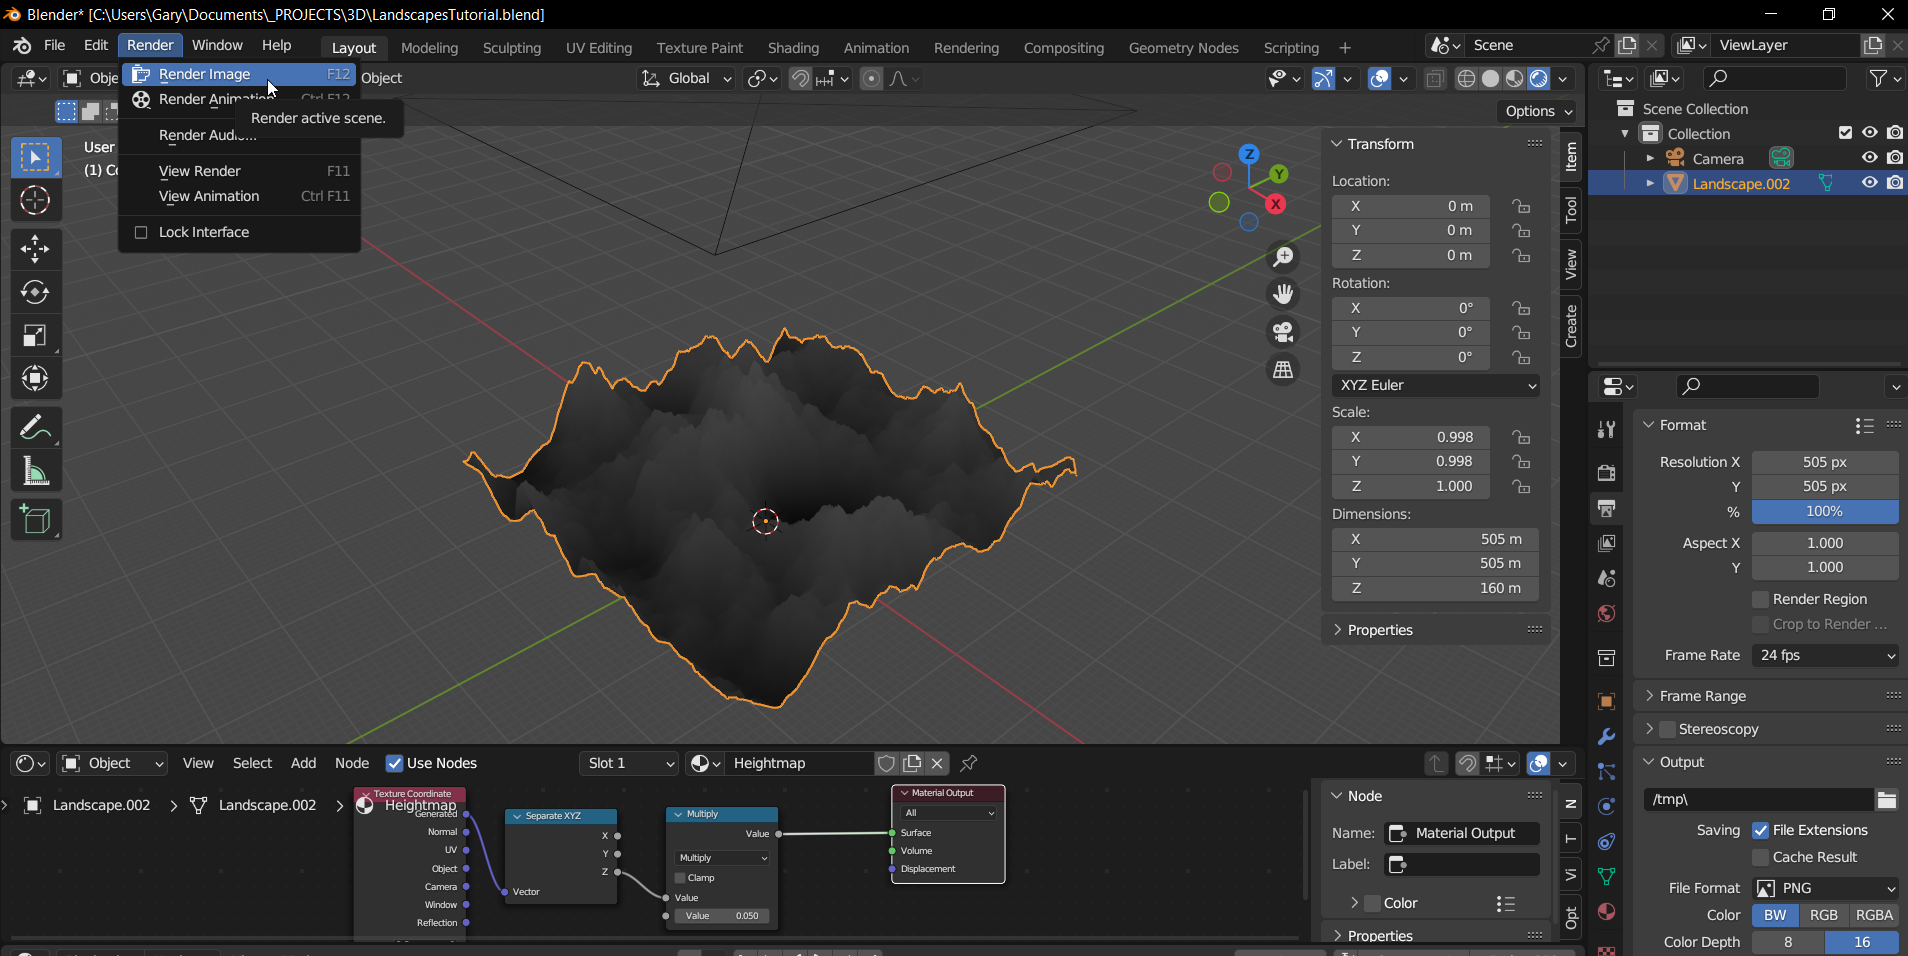
We are finally ready to render a Heightmap!
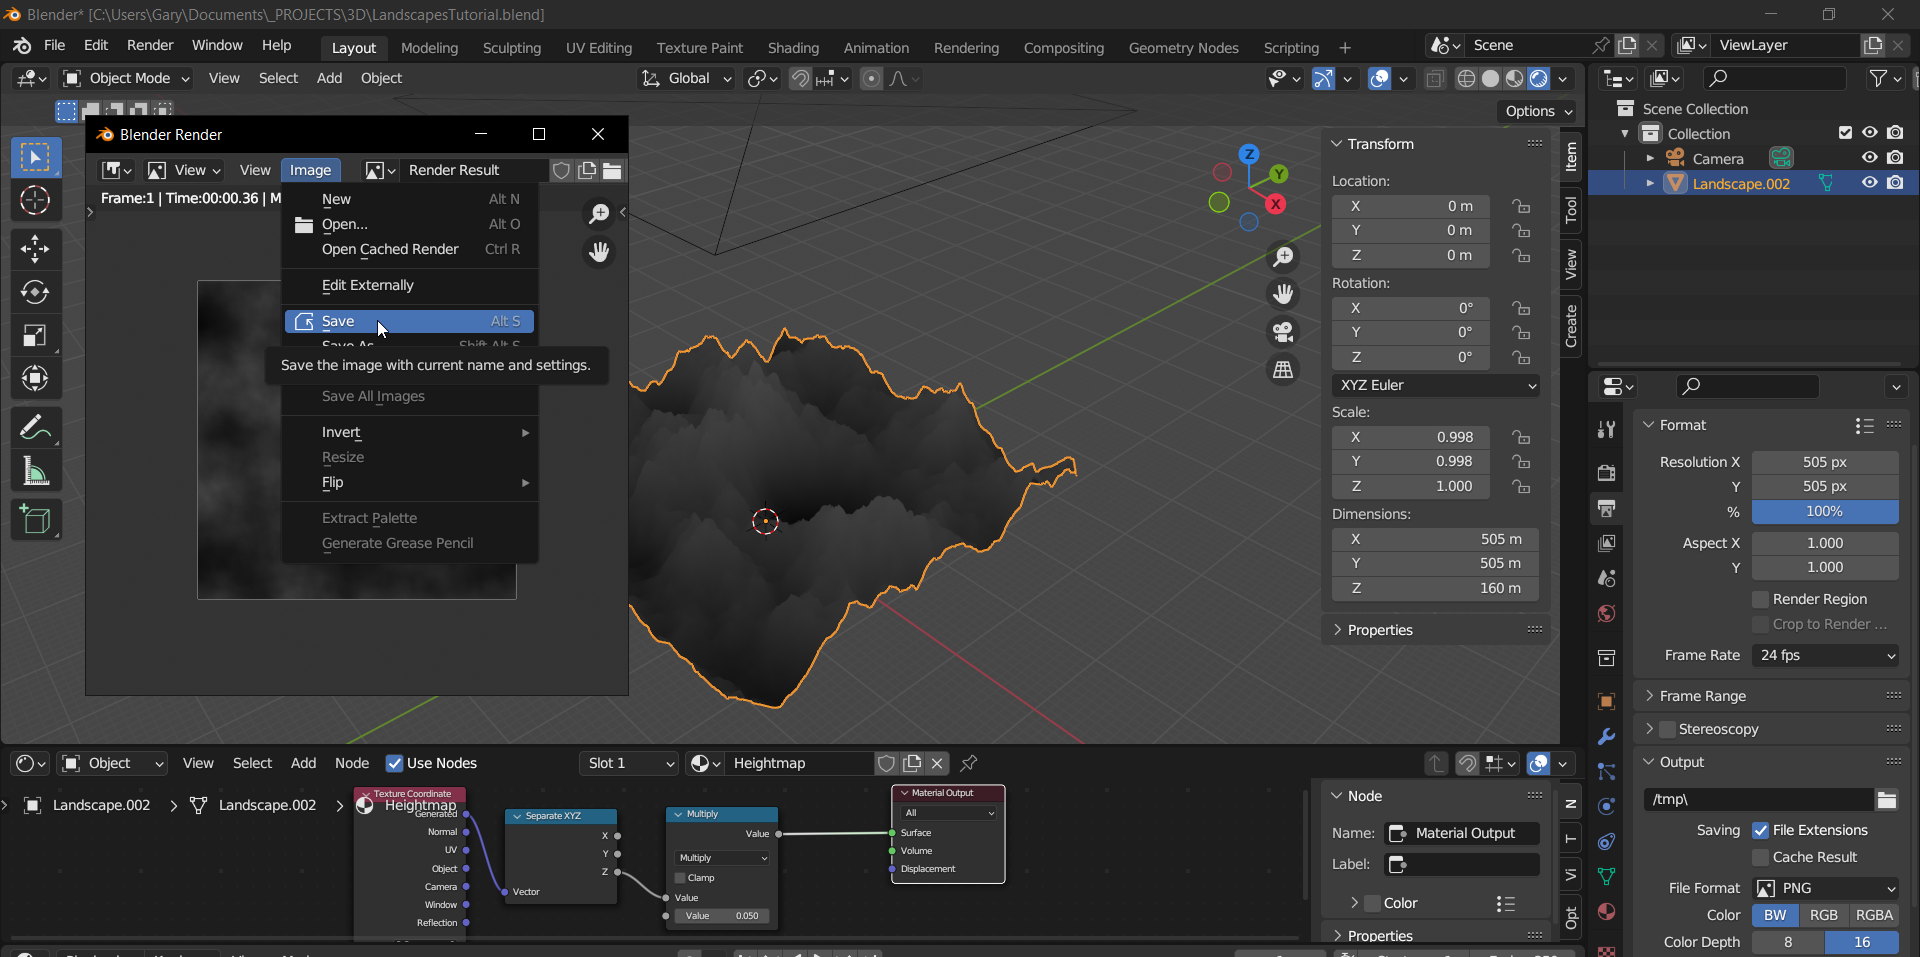
Go ahead and save it!
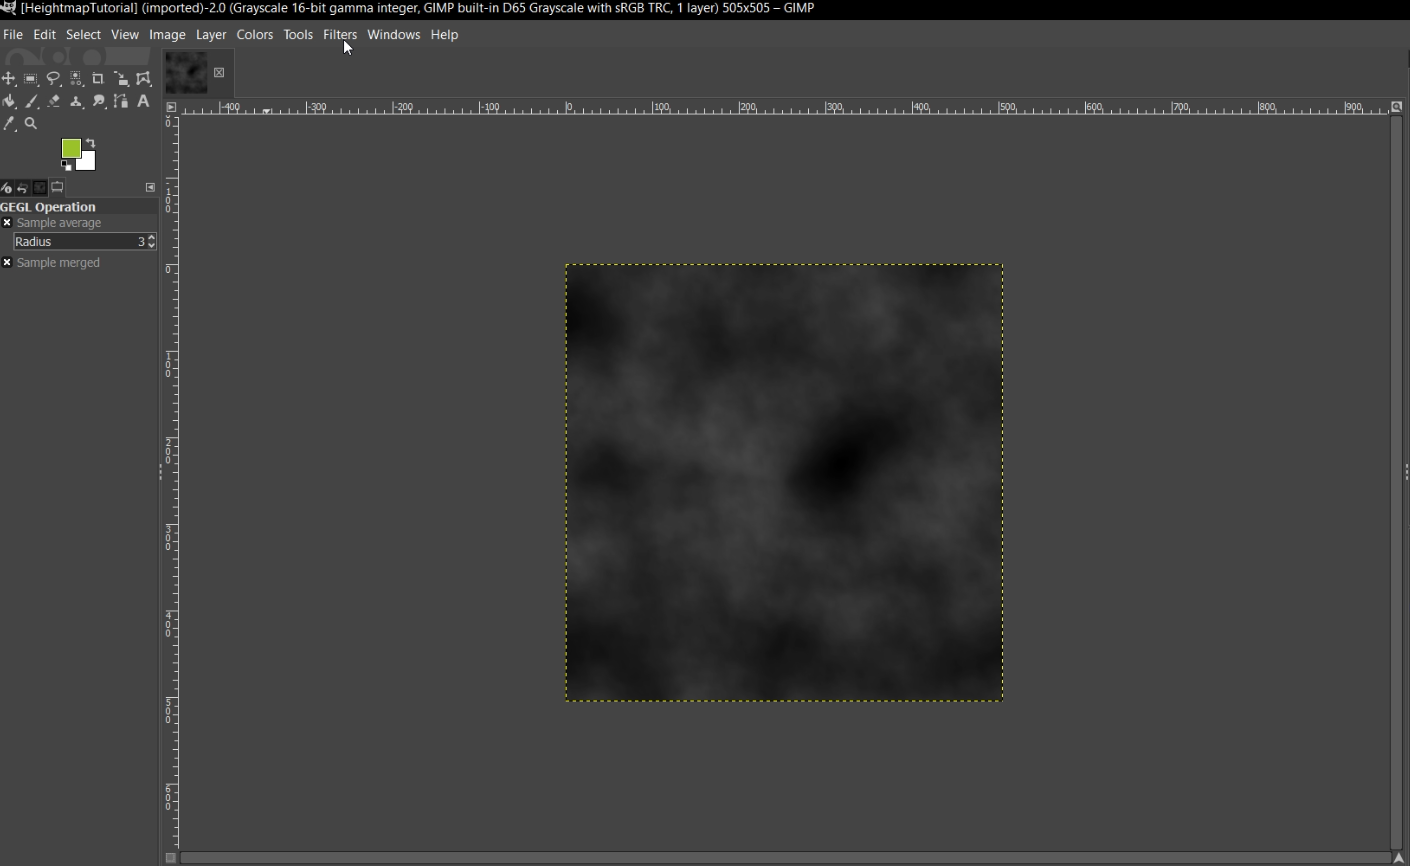
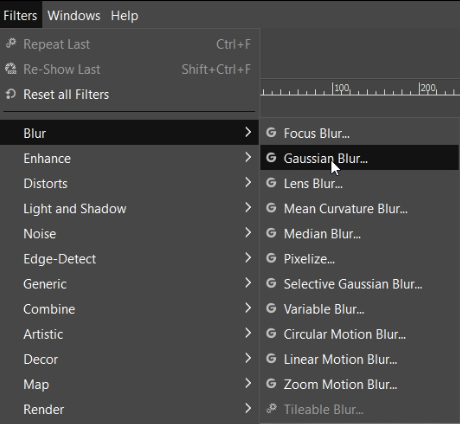
Open the Heightmap in GIMP and go to Filters > Blur> Gaussian Blur.
Here are the settings I use for my blur.
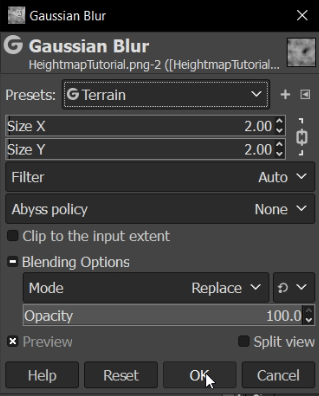
The purpose of the blur is to prevent artifacts in the Landscape, without it, parts of the Landscape will look jagged.
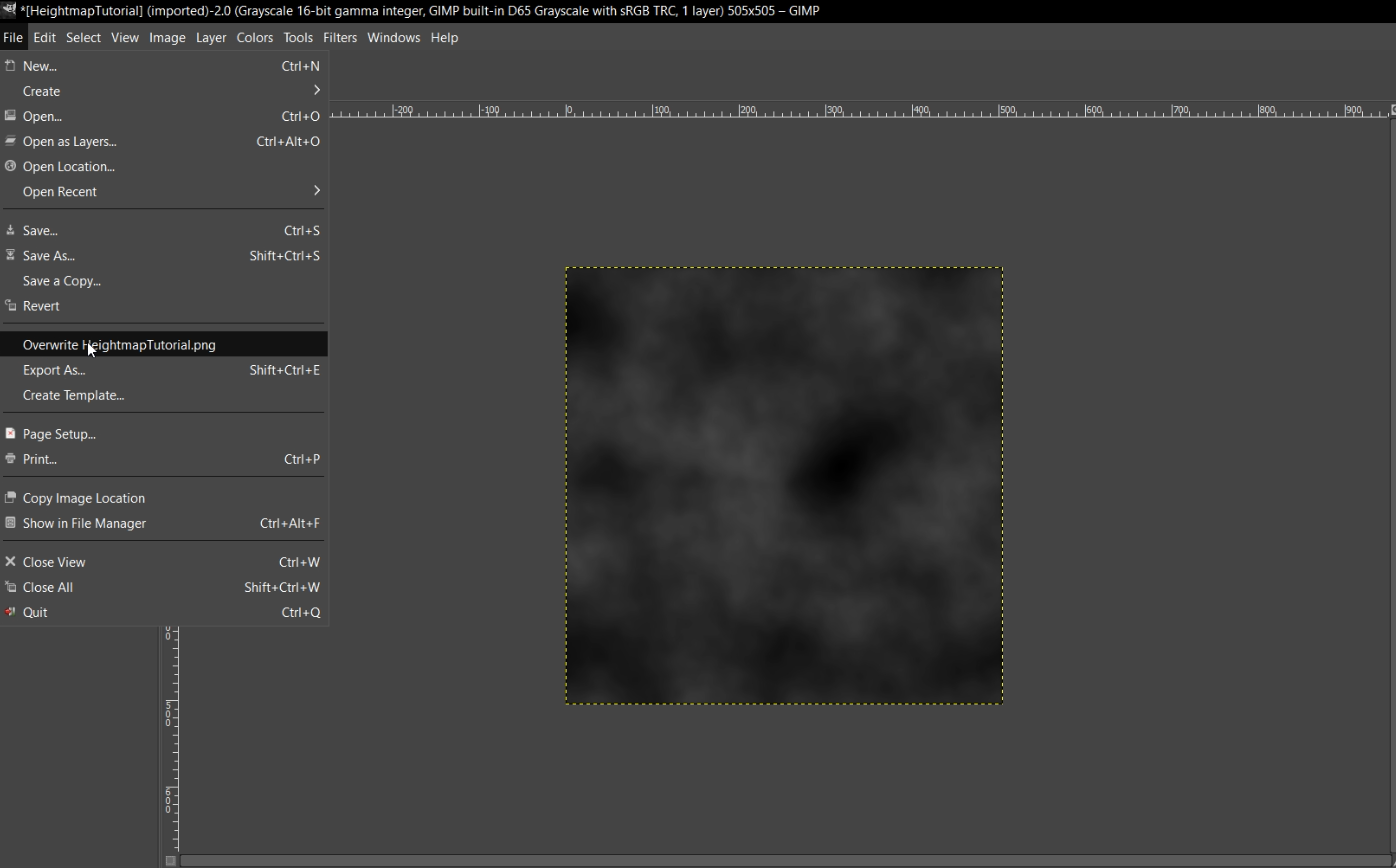
Now click File > Overwrite.
The Heightmap is now ready for Unreal Engine!
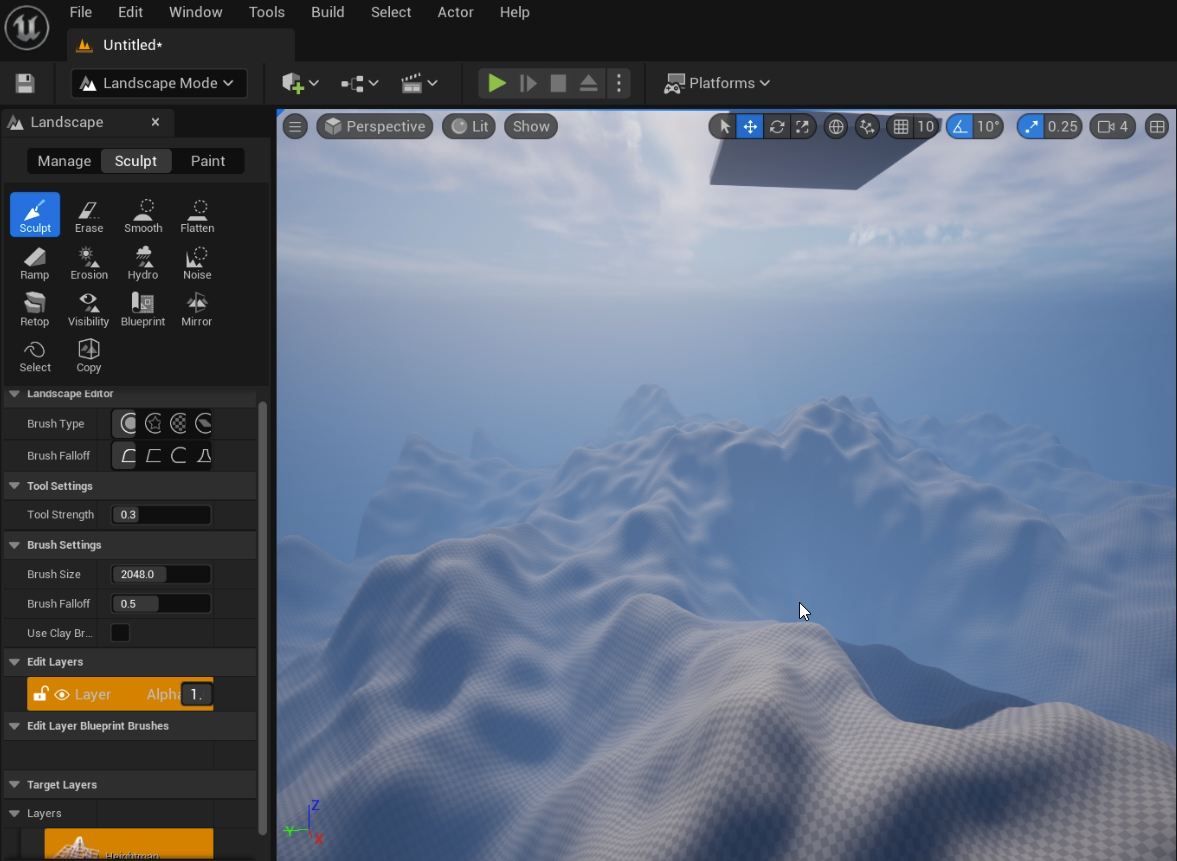
In your Unreal Engine Project, go to Landscape Mode.
Select "Import from File", press ... next to heightmap to assign the heightmap, then press import!

All done! Congratulations!~
I hope this tutorial is helpful to you! If you have any questions, comments or suggestions, leave a comment below! Thanks for reading and for your support!
Leave a comment
Log in with itch.io to leave a comment.